· Kk · 2 min read
pfsense: Create multiple vLAN and segregate traffic
Summary
pfSense is an excellent product and can be customised better than professional devices available from large vendors. pfSense is open-source, can be installed into an old laptop or Mini-PC and can scale from home lab setup to medium-large enterprises. This article focus on Creating "multiple LAN segments" within your home network, thus segregating traffic for different type of devices

Pre-Reqs
- device with pfsense installed. I have installed pfsense in an OLD laptop with 2 ethernet ports
- VLAN switch with ability to Securely separate networks (VLAN) (New type of plus switches are cheaper around £20/$30 for 8 ports)
- Quite few Ethernet cables (short lengths would be perfect)
Setup within pfsense
The settings are divided mainly into 3 parts
- Creation of VLANs (For instance I've created 3 VLANs as below). The VLAN tag is quite important setting which is used to filter within the Switch

- Configuration of VLANs (eg shown below and better to assign /24 range)

- Configuration of Firewalls: This is slightly more complex. Below is a screenshot to allow various traffic and block rest
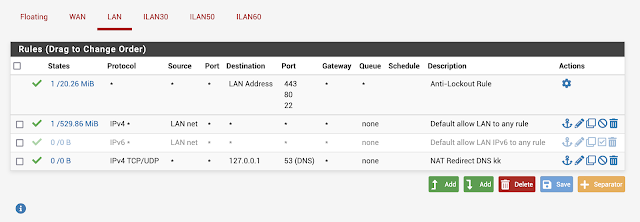 |
| LAN settings |
 |
| One of the VLAN setting |
Setup on VLAN Switch
Once the setup is done within pfSense, then the Switch acts as the distribution mechanism. The switch is connected to the LAN output of the pfSense. The example uses NETGEAR 8-Port Gigabit Ethernet Smart Managed Plus SOHO Switch (GS308E) which have plenty of documentation
The VLAN switch configuration consists mainly of
- VLAN configuration. I've used 802.1Q VLAN Identifier Setting as below. Take extra care on the VLAN ID and the Port Members

- PVID Configuration - Assigning Port to PVID
