· df · 3 min read
NUC5i5RYH - Barebone PC as Linux Server
After thinking of installing VMWare ESXi on NUC5i5RYH barebone , I decided not to go ahead. This is because you need a separate system to manage (vSphere Client) to manage your lab which in my case was not helpful. I decided to go ahead and install CentOS 7 as my main OS(host) and install VMware workstation to support Windows Server (for ActiveDirectory) as guest.
I faced few issues while installing CentOS into the i5 NUC. Mainly because the CentOS Kernel & drivers are bit outdated compared to NUC. Just to document what I've done to fix them !!
Now you could install GUI by
sudo yum groups install "GNOME Desktop"
I faced few issues while installing CentOS into the i5 NUC. Mainly because the CentOS Kernel & drivers are bit outdated compared to NUC. Just to document what I've done to fix them !!
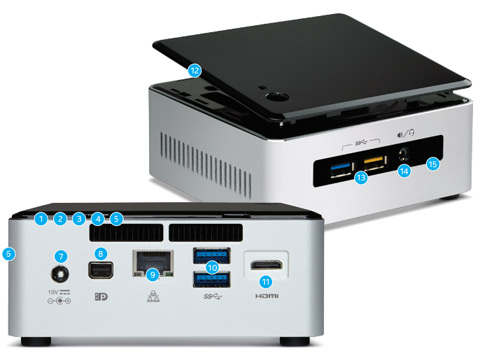 Preparation
- Download Minimal CentOS7 from main site
- Use "UNetbootin" to put the ISO into thumbdrive.
- FAT32 formatting of your USB is best suited
Installation
- Attach bootable USB to your NUC and enter ensure your USB as primary boot.
- Ensure you create a "root" user and password
- Reboot and CentOS installation is straight forward.
Network Issues
Your Wi-Fi won't be listed in your detected devices (ifconfig, iwlist etc are not installed)NetworkManager to your rescue
NetworkManager Command Line (nmcli) is very powerful. Full details here
sudo su - # All activities in rootnmcli device show # Shows all devices available. Only your ethernet and loop back would shownmcli con show # Shows connections available. You won't be able to see anything initially
Installing Relevant Driver.
(You need an extra laptop for this)
I had CentOS 7 with Kernel 3.10.x . NUC5i5RYH uses Wireless 7265 ,but the downloads are meant for Kernel 3.13+ onwards. So I had to download multiple drivers thus facing lot of hit & miss. I can confirm, the driver that works is "iwlwifi-7265-ucode-25.228.9.0.tgz" though it's for a higher Kernel. Extract just the "iwlwifi-7265-9.ucode" file from the archive and copy it into usb drive and copy it to /lib/firmware/ of your CentOS installation. (USB mounting tips at this link). Now REBOOT your NUC
Verify if your Network is detected.
sudo su - # All activities in rootnmcli device show # Shows all devices available. Now it show a wireless device (eg wls2p0)nmcli con show # Connections won't be still available
if no devices are shown, something went wrong. Need to debug by running "dmesg | tail -100" to see if there are any errors when OS rebooted.
Add your interface
Now try adding a new connection to your interface using networkmanager cli (wls2p0 is my ifname shown when I ran "nmcli device show") . More Details in this link
nmcli con add con-name wls2p0 ifname wls2p0 type wifi ssid MyInternetConnectionName ip4 192.168.100.101/24 gw4 192.168.100.1service NetworkManager restart# This should restart network
You should be now able to see ifcfg-wls2p0 file in /etc/sysconfig/network-scripts/ location with above details and will get a MAC address automatically.
Adding wifi plugin to NetworkManager
Unfortunately "NetworkManager" itself doesn't contain wifi setup plugins. You need to download "NetworkManager-wifi" rpm offline package separately into your laptop. Copy this again using usb into your NUC. Install it using rpm -Uvh <rpmfile>
Verify if the package is installed
rpm -qa | grep NetworkManagerservice NetworkManager restartservice NetworkManager status
Connect your Wifi
nmcli device wifi connect <MyInternetConnectionName> password <myPassword>
Verify by running
curl -k https://www.google.com
Atlast, it should all work now !!
sudo yum groups install "GNOME Desktop"